battery well
-
captron945
- Posts: 14
- Joined: Wed Jan 28, 2009 1:22 pm
battery well
I am a new Meyers Manx owner. Bought it in December. WOW, this thing is fun. Never owned a VW. The original builder did an OK job putting it together. Some things he did well, some not so well. It appears to be a 1966-1968 frame. Ball joint front end, swing axle rear. Someone along the line butchered the battery well area. They cut out the bottom of the well so the battery sits in the original tray on the frame. I would like to correct this ugly mess by re-creating the battery well area. It is a 12 volt system. #1-How best to form the new well area? Fill with foam and shape from the bottom? Is there a aftermarket piece that can be "glassed" in? What are the deminsions? #2-will a 12 volt battery fit in the re-created well area? I'm thinking of the Optima dry cell batteries. Thanks for your help. I look to be posting many times in the future for advise. ron, #3326
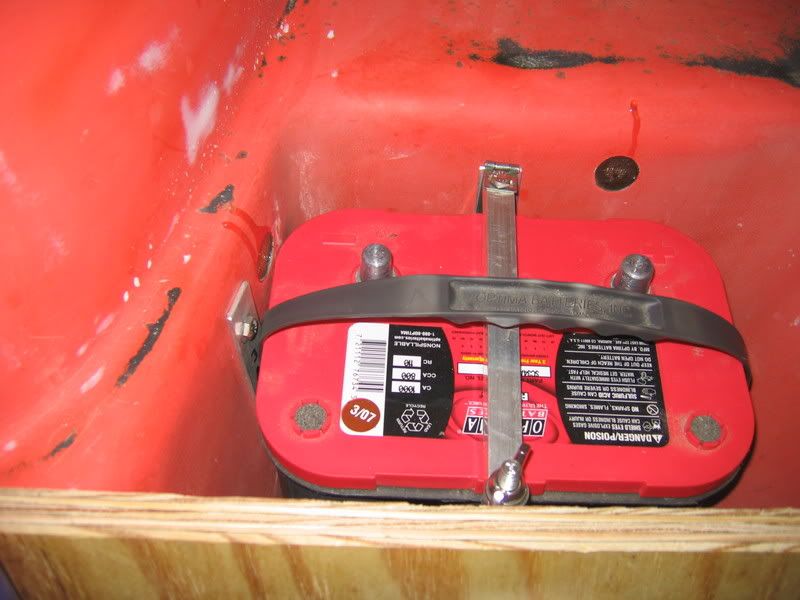
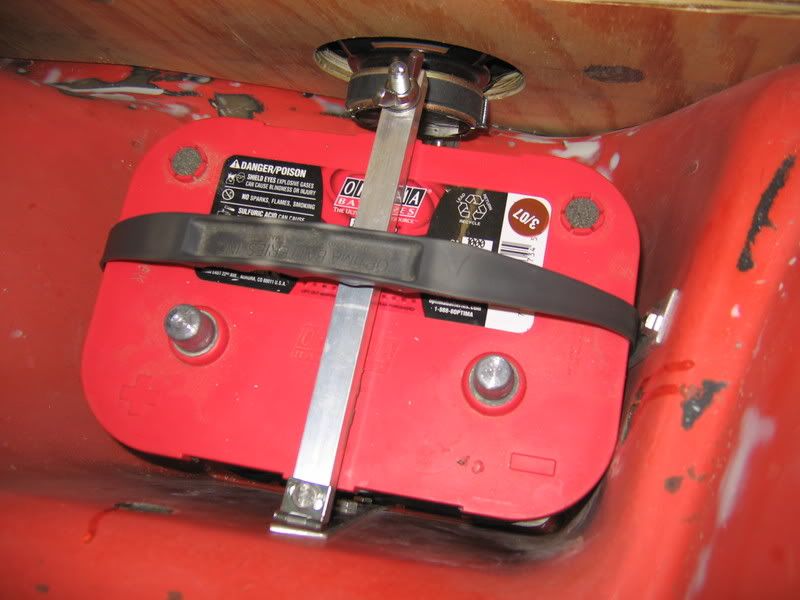
My battery area was rather thin. you could do the same, Form a mold from the inside and glass from the underbody side. Abraide off any undercoating to get the best bond. Use lots of cloth/mat especially on the bottom of the battery area. I then made a aluminium plate with some vertical arms (1" wide) and welded them to the base. Then put the tray into the bottom of the battery bay and attached the arms to the side of the battery bay using lots of fender washers to distrubute the load. I also made a bracket to firmly hold the battery in place. See pictures. If you cant see the aluminium tray I could remove my battery and take more pictures. the aluminimum tray has the same footprint as the battery. You could also glass in a aluminium base too. Hope you can get in there to glass this all in. Carlton 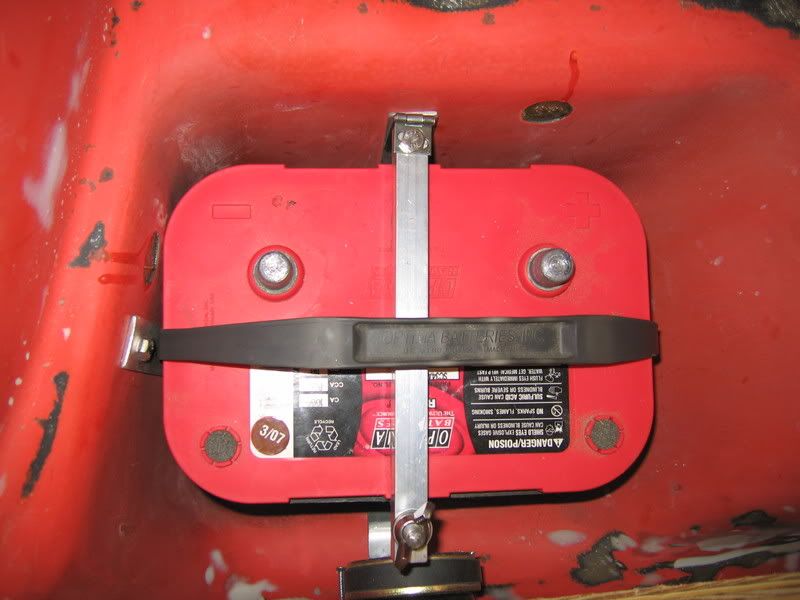
 Done and finished
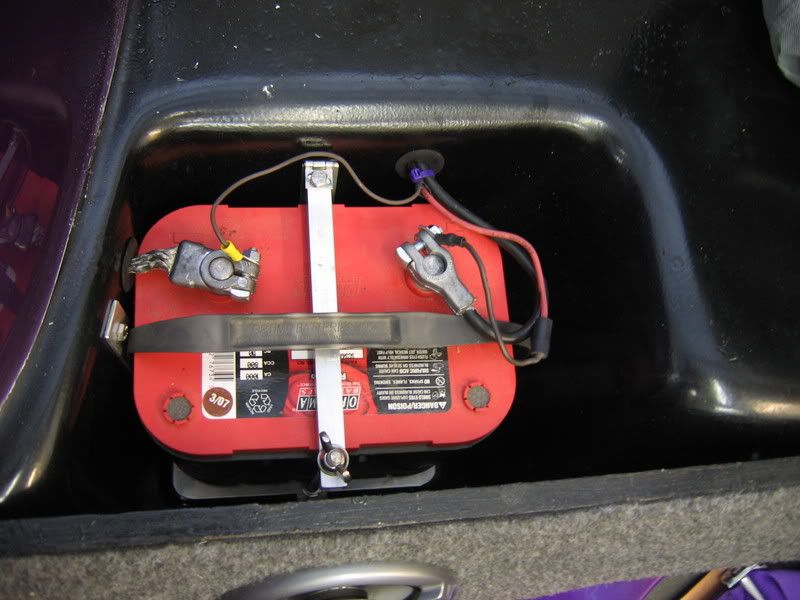
Done and finished -
captron945
- Posts: 14
- Joined: Wed Jan 28, 2009 1:22 pm
battery well
Thanks Carlton, This looks like what I wanted to do. The last picture looks like a molded in piece. Is that correct. Do you still have the mold??? Could you, or anyone else, provide diminsions. top width and length, bottom width and length, depth. Do you, or anyone else, know of someone who makes a stub in piece. Like Goodmark Industries makes metal panels that get welded in to replace rusted areas.

I did not use a mold. I was reinforcing what I had then Gel coated it to make it look original. You could apply mold release to your bay. fill it with two part foam. form the bottom and coat with mold release then glass in a new bottom. Remove the foam mold and go from there. I will also say that it is much easier if you can flip your body over. Tap Plastics does make a thicksotropic (sp?)"thicker" poly resin that you may be able to apply upside down, or thicken it with a filler Good luck either way.
-
mel hubbard
- Posts: 841
- Joined: Sat Jul 23, 2005 8:00 pm
Ron,,, an easy way without fipping the body tub would be to take up manxrobs offer of taking a splash mold. If your not too bothered about the inside of being slightly smaller (only by the thickness of the glass) you could use that splash to push into your own original battery box and glass it in from the topside. If you grind everything to taper it should blend in well,,, the splash would only need to be a thin lay-up because you could make it stronger by glassing from the original glass and add more to the part manxrob makes. You could then skim the inside with bondo and smooth off to get rid of the roughness, thats if your bothered about a rough side in that area.
Ron and I did close the electronic divide. Here is what we came up with, and the story of making a mold to replace a missing Manx battery box so far. Maybe others can use some of these techniques on their projects, can learn from my misteps, and/or offer easier better ways. First off, Ron's buggy is a Manx, so pulling a mold from my old parts body would be a valid repair. When using molds for repairs it's important the parts are exactly alike. Ron supplied this photo so I knew how big a mold was needed:  When Ron said his battery box was missing he wasn't kidding! I still have my old damaged Manx body hidden in the bamboo grove, and the battery box is still intact though showing a few bumps, bruises and holes. I did a quick cleanup and used some modeling clay to make temporary repairs. I then Sprayed a coat of silicone release agent to aid in mold removal. 2 layers of 3/4 oz mat makes for a mold thin enough for easy removal, but sturdy enough for a 1 time usage mold.
  I've had this problem before where the wet fiberglass resin reacts with underlying paint, making mold removal tough. This is another reason for making thin, easily broken molds. I felt it was better to just break out the mold and start over, rather than risk damaging the old Manx body to extract the mold. What am I missing here? Would PVA keep the paint from reacting?:
  So I cleaned up the body, removing the paint down to original gel-coat, re-plugged the body with clay, applied a coat of wax, a couple of coats of PVA release film, and a shot of silicone, (It really is kind of a tough part to release!) just to be sure.
  To be continued:
When Ron said his battery box was missing he wasn't kidding! I still have my old damaged Manx body hidden in the bamboo grove, and the battery box is still intact though showing a few bumps, bruises and holes. I did a quick cleanup and used some modeling clay to make temporary repairs. I then Sprayed a coat of silicone release agent to aid in mold removal. 2 layers of 3/4 oz mat makes for a mold thin enough for easy removal, but sturdy enough for a 1 time usage mold. I've had this problem before where the wet fiberglass resin reacts with underlying paint, making mold removal tough. This is another reason for making thin, easily broken molds. I felt it was better to just break out the mold and start over, rather than risk damaging the old Manx body to extract the mold. What am I missing here? Would PVA keep the paint from reacting?: So I cleaned up the body, removing the paint down to original gel-coat, re-plugged the body with clay, applied a coat of wax, a couple of coats of PVA release film, and a shot of silicone, (It really is kind of a tough part to release!) just to be sure. To be continued:With lots of release agent in the battery well I layed-up a double layer of 3/4 oz mat, with an additional layer over the top edge on to the rear deck to aid in mold removal:  After a 24 hour 'green cure', I removed the mold by easing a plastic wedge (an old plastic spatula) around the top edge, watching as the mold released down into the battery well, and then lifted up on the top flange to pop the mold out. You can see some of the modeling clay patches stuck on the mold and some on the body. The layer of PVA release remained stuck on the mold. It peals off easily:
  Trimmed up, the mold will sit in Rons missing battery well, indexed by the curves on the rear bench and body mounting flange. A new battery well can then be layed up and bonded to the body in one step, and the mold removed after the fiberglass sets.
  I'll let Ron take the repair from here.
After a 24 hour 'green cure', I removed the mold by easing a plastic wedge (an old plastic spatula) around the top edge, watching as the mold released down into the battery well, and then lifted up on the top flange to pop the mold out. You can see some of the modeling clay patches stuck on the mold and some on the body. The layer of PVA release remained stuck on the mold. It peals off easily: Trimmed up, the mold will sit in Rons missing battery well, indexed by the curves on the rear bench and body mounting flange. A new battery well can then be layed up and bonded to the body in one step, and the mold removed after the fiberglass sets. I'll let Ron take the repair from here.