Manx hardtop mounting?
Manx hardtop mounting?
What is the original Manx "approved" method for mounting the hardtop to the buggy? I'm also interested in seeing custom hardtop mounting. Post your pics or instructions. Thanks...
-
Siggymanx33
- Posts: 353
- Joined: Thu Apr 22, 2010 5:00 am
The front of the hard top fits over the front lip of the windshield. It does not go into the windshield groove: 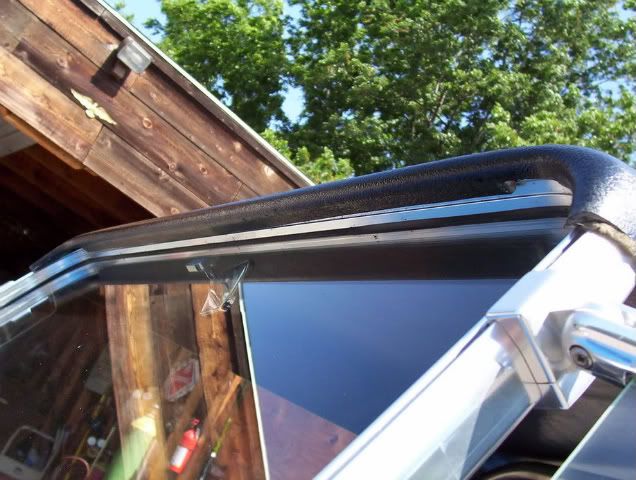 There are aluminum straps that get bolted to the insides of the rear 'ears' of the hard top. I used the originals as patterns to make steel versions:
 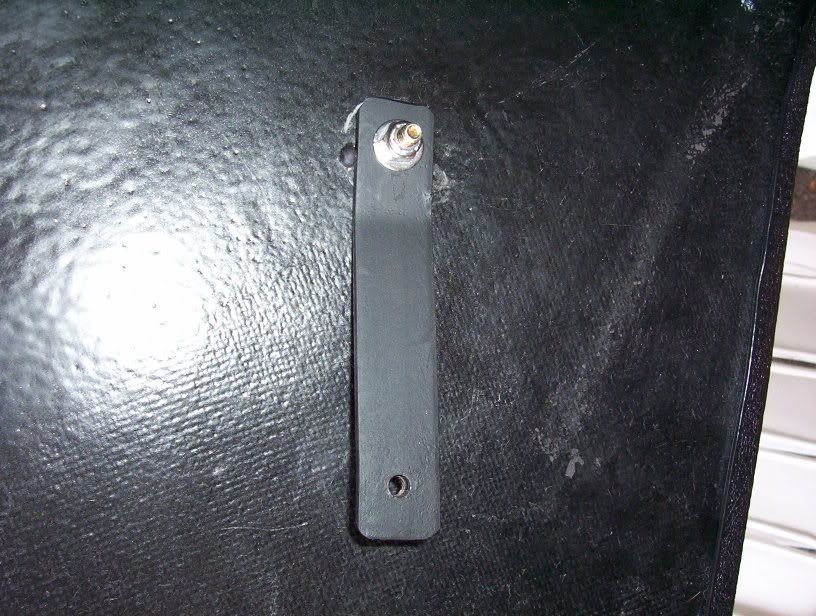 If you look closely in the above photo, you can see that the bottom hole is threaded. I welded a nut to each new piece so it would be easier to get the bolts in and out. The bolts go through holes you have to drill in the roll bar:
 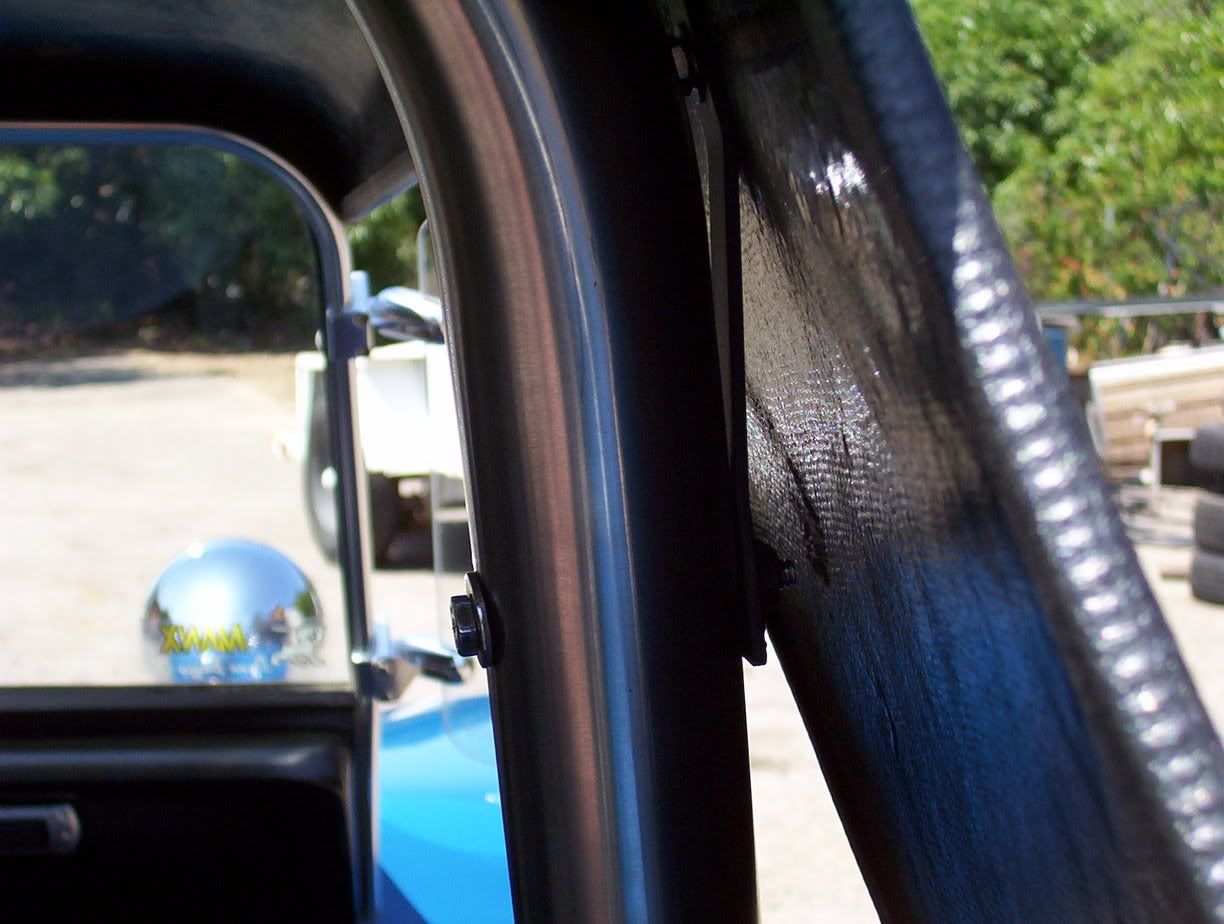 The original mounting brackets had an additional smaller hole near the bottom hole. A spring went into this hole and then attached to an anchor in front of the roll bar. The idea was to have the bracket pivot on the bolt that went through the roll bar and have spring tension keeping the hard top seated in the windshield lip. The purpose for this was if there was body flex, you could crack your windshield because there was no give in the hard top. The spring mounting system allowed the top to move at the windshield mounting point. I did away with the spring mounting system because I installed the 1" square tubing in the channels of the pan's outer lips. A body lift or full roll cage will also provide enough stifness to make windshield breakage a non-issue. The rear 'ears' of the hard top like to spring out and then slam back into the buggy's body, even when the top is mounted solid. Also, the foam rubber weatherstrip that came with the top likes to come off and the adhesive melts and runs down your gelcoat. I replaced the foam weatherstrip with pieces of a buffing wheel and made brackets that keep the ears in place:
 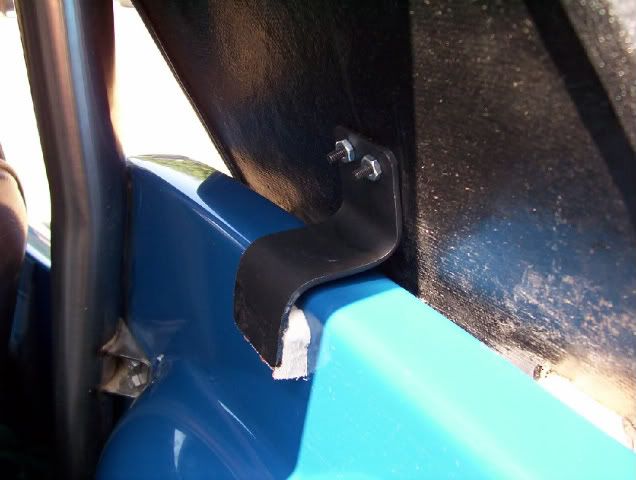 To be continued...
There are aluminum straps that get bolted to the insides of the rear 'ears' of the hard top. I used the originals as patterns to make steel versions: If you look closely in the above photo, you can see that the bottom hole is threaded. I welded a nut to each new piece so it would be easier to get the bolts in and out. The bolts go through holes you have to drill in the roll bar: The original mounting brackets had an additional smaller hole near the bottom hole. A spring went into this hole and then attached to an anchor in front of the roll bar. The idea was to have the bracket pivot on the bolt that went through the roll bar and have spring tension keeping the hard top seated in the windshield lip. The purpose for this was if there was body flex, you could crack your windshield because there was no give in the hard top. The spring mounting system allowed the top to move at the windshield mounting point. I did away with the spring mounting system because I installed the 1" square tubing in the channels of the pan's outer lips. A body lift or full roll cage will also provide enough stifness to make windshield breakage a non-issue. The rear 'ears' of the hard top like to spring out and then slam back into the buggy's body, even when the top is mounted solid. Also, the foam rubber weatherstrip that came with the top likes to come off and the adhesive melts and runs down your gelcoat. I replaced the foam weatherstrip with pieces of a buffing wheel and made brackets that keep the ears in place: To be continued...There should be a small gap between the roll bar and the hard top (you can also see the original spring anchor in the left had side of this photo): 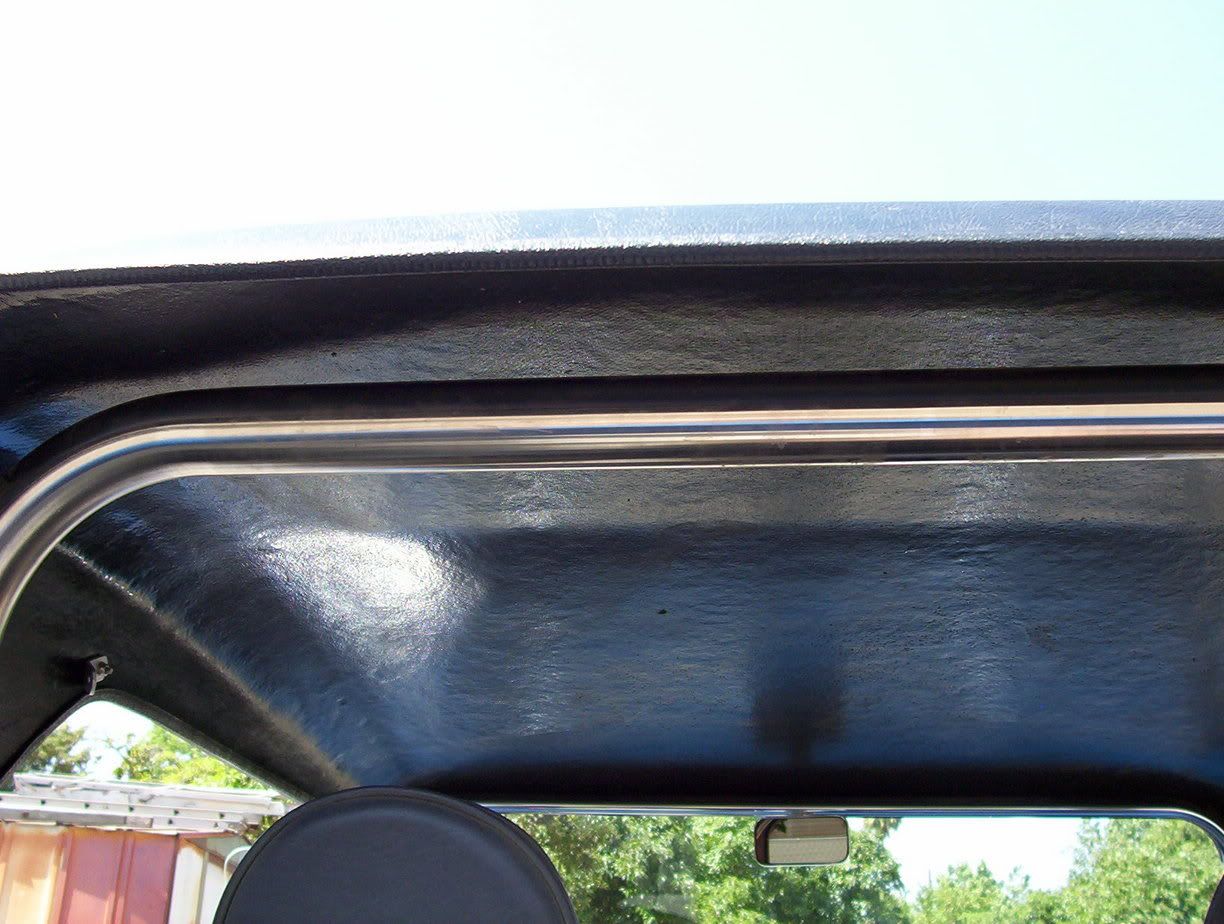 I wanted to incorporate a roof rack to go with my hard top, and I decided it would be best to sandwich the top between the rack and the roll bar. I got a couple of those rubber spacers that are used for shock reservoirs and cut them in half. This gave me pieces that were flat on one side and curved on the other. They fit fine between the top and the roll bar, thus filling the gap (sorry no pictures). I put stainless steel U-bolts around the roll bar and through the top / roof rack feet. This holds everything down very tight!
 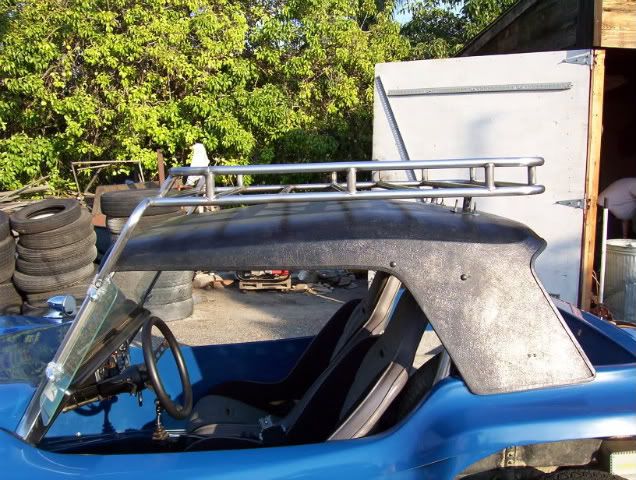 I then had an upholstery shop add a rear window:
 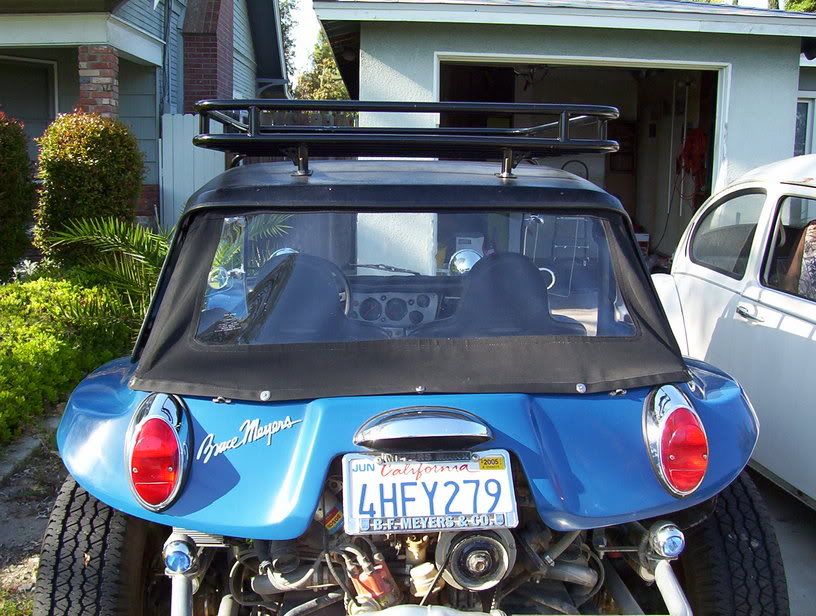 At least that's what I did... Please let me know if you need any clarification or additional photos.
I wanted to incorporate a roof rack to go with my hard top, and I decided it would be best to sandwich the top between the rack and the roll bar. I got a couple of those rubber spacers that are used for shock reservoirs and cut them in half. This gave me pieces that were flat on one side and curved on the other. They fit fine between the top and the roll bar, thus filling the gap (sorry no pictures). I put stainless steel U-bolts around the roll bar and through the top / roof rack feet. This holds everything down very tight! I then had an upholstery shop add a rear window: At least that's what I did... Please let me know if you need any clarification or additional photos.-
mel hubbard
- Posts: 841
- Joined: Sat Jul 23, 2005 8:00 pm
I made all the authentic Meyers Manx kits for the UK market, from 99 to 03. I found that the screen and hardtops need to be locked together. The screens available today are not as tough as they were back in the 60s. I did some tests, and found that it was possible, for flexing, and strong winds combined to cause the hard top to pop off the screen. To overcome this, I fixed a small block of wood (painted mat black) to the hardtop, this was pushed tight to the screen, on the underside of the hardtop, then drill through the wood and the hardtop together, fix with a domed head bolt through the roof-top & wood followed by a washer and a wing nut for easy removal, you could even paint the dome head to match the gel. The test I did back then, was to bolt a body tub to a trailer, bolt on a screen and a roll bar, (a kinda mock up manx with no chassis) and tow the thing on a windy day, I hit 85 MPH, and the hard top was fine, this was with no other reinforcements, the hood was fixed in the usual way, and the screen was bolted just to the GRP with no steel frame 
Is that the way the top on the Black Manx with BRM's, which was featured in Volks World last year was done? I've seen a few other pic's of it and can see a block or something against the windscreen. Also do the rear ears of the top go outside of the tub, or mount inside? I'm guessing this is a personal preference thing.
[QUOTE="bigblksoul"]Is that the way the top on the Black Manx with BRM's, which was featured in Volks World last year was done? I've seen a few other pic's of it and can see a block or something against the windscreen. Also do the rear ears of the top go outside of the tub, or mount inside? I'm guessing this is a personal preference thing.[/QUOTE] The rear ears ("C" pillers) were designed to go outside of the body....But...The nice thing about buggys is you can do your own thing.
-
mel hubbard
- Posts: 841
- Joined: Sat Jul 23, 2005 8:00 pm
Yes the ears of the hardtop should be on the outside  but Pete, the guy that built this Manx up, chose to tuck em inside the tub,, not my idea. Funny thing is, this was the actual Manx (mock up) that I did the test with, but the ears were on the outside,, on the 85 mph test. Also there were no springs fitted to keep the hardtop tensioned to the screen,, as you don't need em ,, I drilled through the roll bar into the ears, and used a dome head bolt with a hard (hose like tube) spacer between the hardtop ears and the roll bar, secured by a wing nut with spring washer on the inside. A piece of hard foam glued on the hard top above the roll bar to stop any rattles, and job done. :rock: Easy guys, 3 wing nuts, and no springs, this way, the roll bar will give support to the screen, instead of putting constant unecessary pressure on a screen frame.
I tried a different method.
drop me a line at monki772003@yahoo.co.uk for some pic's of another way to mount these hard tops its very very simple. I fitted mine on the inside of of the tub with some custom spacers and 4 coach bolts it looks very neat and very simple - I also don't run a roll hoop! so let me know if your interested buddy :hello: