Page 6 of 7
Re: Bud's Manx Restoration
Posted: Thu Feb 11, 2016 4:46 am
by marklandon
Hi Joe The Tiger Tow'd has about 14 gal tank so its not a problem and sitting that long is also not a big deal I only wish I had taken photos of the tank when I had it all apart I will have to do it next time so I can make the same tank for the Subi Tow'd
Re: Bud's Manx Restoration
Posted: Thu Feb 11, 2016 4:51 am
by joescoolcustoms
Cool Mark! I would enjoy seeing it.
Re: Bud's Manx Restoration
Posted: Sat Feb 13, 2016 11:16 pm
by atomicmime
Great job Joe for some long distance cruising! One question: after adding the vent tube on the filler neck, exactly how/where will the vent hose itself be run?
Re: Bud's Manx Restoration
Posted: Sun Feb 14, 2016 5:29 am
by rzeller
atomicmime wrote:Great job Joe for some long distance cruising! One question: after adding the vent tube on the filler neck, exactly how/where will the vent hose itself be run?
Patrick,
Joe may have other ideas but I plan to couple copper tubing or break line (whatever I get my hands on) to the vent tube using a small piece of fuel line. I'll put a couple of loops in the tubing and then route it directly down (through the body) to the ground below the chassis. There's pictures on thesamba or maybe even on this forum showing the venting options like I'm planning to do. I'll post pictures once its all done.
I think Joe's idea was just to run a rubber line off the vent tube and route it straight down below the chassis. I'll let him comment on that.
Thanks,
Bud
Re: Bud's Manx Restoration
Posted: Mon Feb 15, 2016 4:00 am
by joescoolcustoms
There are several ways to route a vent on a fuel tank. No one way is the best. Bud's idea of some tubing that can be bent into a coil, then routed down is a good.
Most important is the placement of the vent. Never from the tank itself. If fuel get above the vent level, as the fuel expands, it pushes fuel out and starts a siphon effect until the fuel level drops below the vent level.
With Bud's high up in the filler neck, unless he squeezes fuel up into the neck trying to out-distance everyone else, it will not happen.
Re: Bud's Manx Restoration
Posted: Mon Feb 15, 2016 8:45 pm
by atomicmime
Thanks for the responses Bud and Joe. The light is beginning to break through... it makes more sense to me now!
Re: Bud's Manx Restoration
Posted: Mon Feb 15, 2016 11:32 pm
by joescoolcustoms
The absolute best way to vent a tank is with a vented fuel cap. it will always be the highest point in the tank, no extra vent needed, and it is outside of the buggy "compartment".
Re: Bud's Manx Restoration
Posted: Tue Feb 16, 2016 6:56 am
by joescoolcustoms
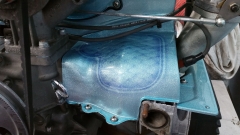
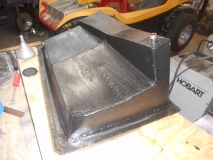
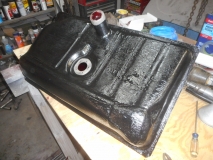
Tank is completely finished and ready to go in the buggy.
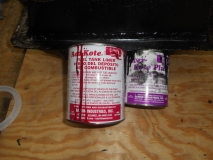
The inside was cleaned again with a industrial solvent and hot water. Tumbled with a hand full of 3/4 inch nuts inside the tank. Triple rinsed with hot water, (all nuts retrieved). Washed with about 1 quart of Acetone to absorb any remaining water. Then 1 1/2 cans of Damon Red Koyte were put in the tank and tumbled slowly to coat all interior surfaces. The excess Red Koyte was drained from the tank.
After two days curing, the exterior was coated with Damon Over Koyte Plus, twice. The exterior coat does not look all that "bling" like a good coat of gloss paint, but it is a second sealer and protector. My tank has a dent in it from off roading at Big Bear in '14. The dent is about 1/8 inch deep, and the Damon Over Coat was not compromised. The stuff is like concrete to get off of any tools.
So, very well protected inside and out. Let cure until there is no smell on the inside before putting fuel in it, and this tank will last a lot of years. (if fuel is put in before all the smell is gone, the inside coating will stop curing and stay soft, and may slowly dissolve into the fuel).
Re: Bud's Manx Restoration
Posted: Wed Feb 17, 2016 10:02 pm
by RedBaronofRedBud
Re: Bud's Manx Restoration
Posted: Thu Apr 28, 2016 8:00 pm
by joem32380
and now we sit and wait for updates and installs
Re: Bud's Manx Restoration
Posted: Thu Apr 28, 2016 8:35 pm
by rzeller
joem32380 wrote:and now we sit and wait for updates and installs
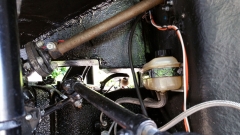
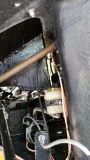
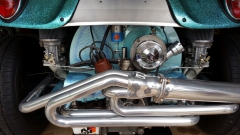
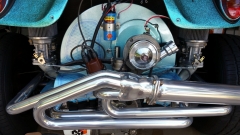
It has been a long process. I now have the tank in the buggy and am almost finished re-installing the hood. While I had electrical quick connects/disconnects installed as part of the restoration, I still have to get everything buttoned back in place and circuits tested. I also took advantage of the "down time" by having a face-lift done to my engine tins. They are all finished and the engine back in place and running. I now have a leaking rear axle seal to deal with

Since I was having pressure issues with my motor I concluded I needed to add a couple of gauges to my dash. I am a minimalist when it comes to my dash so I've been mulling an idea around on how I can have "disappearing" gauges. I've come up with a little custom idea/project that I'm finishing up. Hopefully it will work like it does in my head.
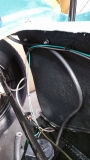
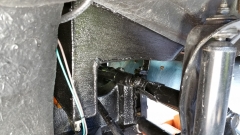
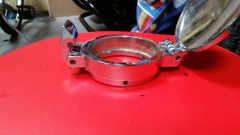
Lastly, and I just found this out, while Joe did a fantastic job of fabricating my tank without the benefit of having my buggy I have to get up under the dash and prop the rear of the tank up just a bit. The decorative gas filler flip-top that I have mounts by three set screws tightening around the filler neck (it sits on top of the hood). Before the tank re-do I believe the flip-top compressed the hood a little in order for it to catch on the neck. Now the hood seems to have "sprung" back up and I don't have enough neck to attach to. I need to get under the dash and add another layer of foam seal under the lip of the tank to push it up just a bit.
I hope to have everything done in the next week or two. Once I do I'll post pictures of everything and you can see for yourself that Joe is truly a master fabricator. He used every available bit of space in the front of my buggy to get me maximum tank volume.
This is a "before" picture. You can see how much stuck out of the hood:
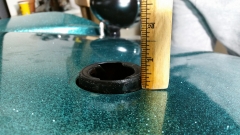
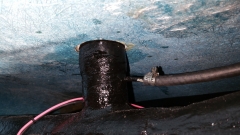
You can see the set screws in the flip-top:
Bud
Re: Bud's Manx Restoration
Posted: Mon May 09, 2016 4:16 pm
by joescoolcustoms
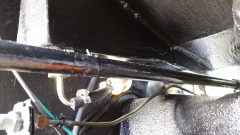
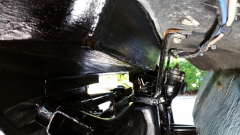
Other than a Dog Butt ugly finish, it looks to fit perfect. And looks to have plenty of clearance for the suspension. Looking forward to seeing what the final capacity comes up to being.
On the FL trip, some will be coasting, some will be drafting, some will turn the engine off and roll. You will be "why do you guys stop sooo much?"
Re: Bud's Manx Restoration
Posted: Mon May 09, 2016 4:31 pm
by rzeller
joescoolcustoms wrote:Other than a Dog Butt ugly finish, it looks to fit perfect. And looks to have plenty of clearance for the suspension. Looking forward to seeing what the final capacity comes up to being.
On the FL trip, some will be coasting, some will be drafting, some will turn the engine off and roll. You will be "why do you guys stop sooo much?"
As soon as I button up a few last things I'll be doing the first fill-up. I'll post the capacity then.
I'll tow those guys to a gas station when they run out