This is great stuff here! Getting a lot of parts ordered and the UPS man is currently cussing me for all the stuff he's delivering, but thanking me for his job security at the same time. I've dropped the ball on the engine work, as I've spent the only nice weather days helping friends move, fixing my buddies truck, etc... Now, the time is mine! With the exception of the Heartwalk next weekend, I'll be spending my time on working on the motor, and getting things ready for me.
The chassis is nicer than I could have pictured, even with pictures of ones I've seen you do in the past. I never thought the body would ever be repaired back to the way it should be, and can't tell you again how much I appreciate you taking this on! Your abilities are amazing!
First Build thread of 2015 and of the new Forum - Loretta
Re: First Build thread of 2015 and of the new Forum - Lorett
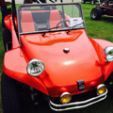
(Loretta) Manx # M2940D910E on customized 1970 chassis that has been "Wheelerized" by Joescoolcustoms
(Scarlett) Manx Resorter #12 (R0012B931S) on 1969 chassis.
(Gunther) Manx 2 # A0202A035E
Tow'dster # TF530G913S
Original Home built buggy that I learned to drive in back in 1995 (the one that started my passion).
Club Member # 4436
Loretta: http://www.manxclub.com/forum/viewtopic ... t=3365Manx" onclick="window.open(this.href);return false;
-
joescoolcustoms

- Posts: 286
- Joined: Mon Jun 03, 2013 5:00 am
- Location: Saint Albans, WV
Re: First Build thread of 2015 and of the new Forum - Lorett
This has been a very fun build for me, lots of work, but I have enjoyed doing it. I also feel slow like the tortoise, but getting it done.
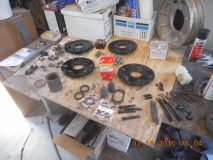
I have neglected updating due mainly to just working. I did realize I had 6 pages of pictures to add, so, here is where Loretta is in the build cycle.
Since the sand blasting, I have Epoxy primed and painted several parts to help speed up putting the chassis together. And as anyone who paints, prep is the time consumer, not the painting. I may have gotten overboard a little, but I am happy with the results. I like different colors on a chassis and not just monochrome black. Subtle, different textures and details to look at. Most of the colors and textures of the coatings do not photo well, but are a real treat to check out in person.
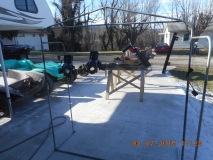
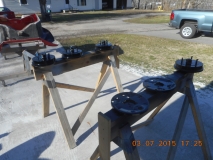
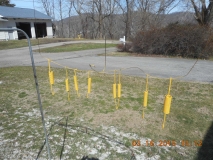
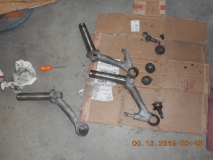
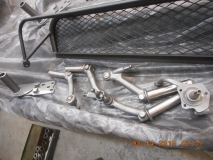
Trailing arms, spring plates, peddles, brackets, nuts, bolts, lock tabs and what ever is exposed got epoxy primed, then top coated. After years of hanging parts from my garage door rails, I quickly welded up a paint hanger rack, and worked very well. Just 1/2 inch EMT.
They silver is a very heavy metalic that does not show up in a picture very well, but really looks wild in person. It looks soo deep that you think it is powder coating. Not a real big contrast from the bed liner black texture, but more of a subtle change not to take away from the body, but more like tasteful jewelry on a beautiful woman.
Can't put ugly bolts on a clean chassis. right?
And if everything else gets cleaned and painted, why not the springs?
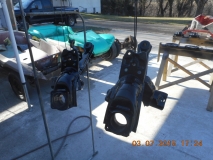
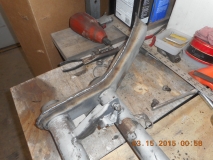
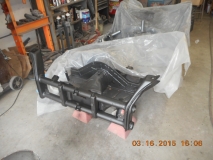
The beam even got it's day in the sun.
Epoxy primed for protection.
And to give it too, a subtle contrast, rubberized undercoating. This gives a more mat finish that lets it stand out from the pan to be it's own part, but not stick out like a sore thumb. It just takes a few days to cure.

Now to start putting some of this stuff together!
I have neglected updating due mainly to just working. I did realize I had 6 pages of pictures to add, so, here is where Loretta is in the build cycle.
Since the sand blasting, I have Epoxy primed and painted several parts to help speed up putting the chassis together. And as anyone who paints, prep is the time consumer, not the painting. I may have gotten overboard a little, but I am happy with the results. I like different colors on a chassis and not just monochrome black. Subtle, different textures and details to look at. Most of the colors and textures of the coatings do not photo well, but are a real treat to check out in person.
Trailing arms, spring plates, peddles, brackets, nuts, bolts, lock tabs and what ever is exposed got epoxy primed, then top coated. After years of hanging parts from my garage door rails, I quickly welded up a paint hanger rack, and worked very well. Just 1/2 inch EMT.
They silver is a very heavy metalic that does not show up in a picture very well, but really looks wild in person. It looks soo deep that you think it is powder coating. Not a real big contrast from the bed liner black texture, but more of a subtle change not to take away from the body, but more like tasteful jewelry on a beautiful woman.
Can't put ugly bolts on a clean chassis. right?
And if everything else gets cleaned and painted, why not the springs?
The beam even got it's day in the sun.
Epoxy primed for protection.
And to give it too, a subtle contrast, rubberized undercoating. This gives a more mat finish that lets it stand out from the pan to be it's own part, but not stick out like a sore thumb. It just takes a few days to cure.
Now to start putting some of this stuff together!
-
joescoolcustoms
- Posts: 286
- Joined: Mon Jun 03, 2013 5:00 am
- Location: Saint Albans, WV
Re: First Build thread of 2015 and of the new Forum - Lorett
Maybe I got ahead of myself going to the painting first, but, in the end, all is done anyway.
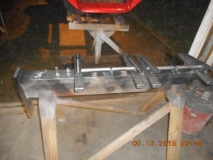
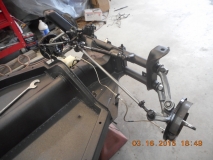
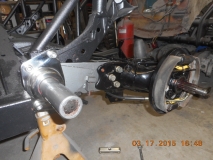
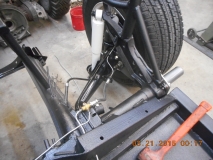
Brian expressed he wanted a little adjustability in the buggy's suspension. So, we added adjustments both front and rear.
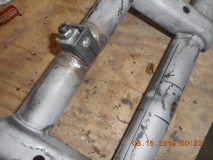
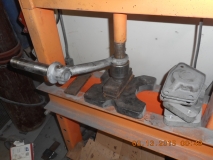
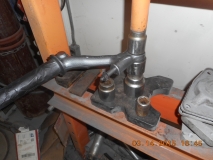
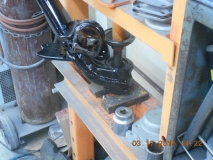
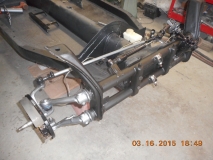
For the beam, dual SAW adjusters are added. I have seen a buddy who used these exact same type of adjusters have one break. The external adjusting "box" factory welds broke and left the adjuster useless. When I add these Adjusters, I also run a small bead over to the four corners of the "box" for a better attaching weld. Does not look that pretty, but better working that pretty.
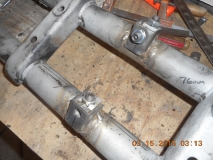
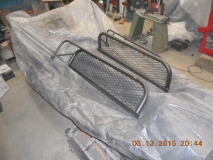
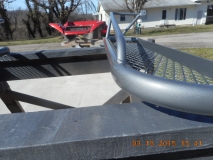
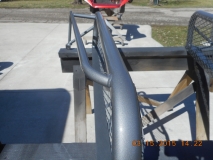
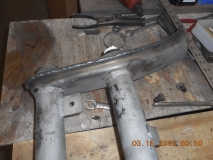
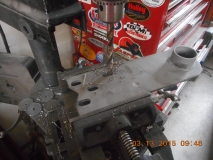
The original front bumper was attached with bolts drilled right through the beam shock towers. Not the strongest way, but got the job done. Since the new bumper I made attaches direct to the beam tube, I filed these holes. They had been overtightened and slightly crushed the sheet metal, and that was bent back out before welding.
Something else I do is to solid weld the factory pinch welded seams of the shock towers. I do this on the rear transmission fram horns too, (forgot to photo before coating). Not only does it add strength to the shock tower over the pinch spot welding, but it also seals out the moisture of this area that in the East US, tends to rot out from the inside out.
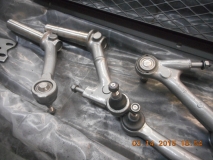
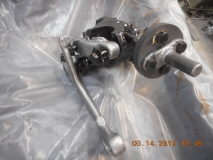
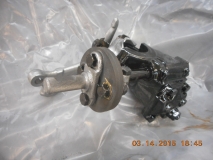
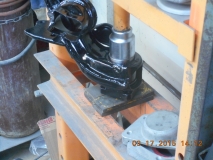
Old ball joints pressed out, new one pressed in.
I clear coat the actual ball joint once it is pressed in so it will not rust and look new for a long time to come. Another subtle item, but adds just a little more color to the overall package.
Adjusted the steering box and put it back together. Painted the tie rod ends and the tie rods.
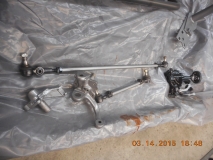
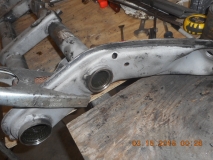
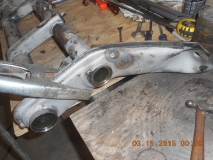
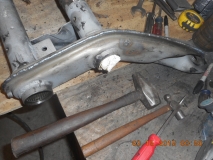
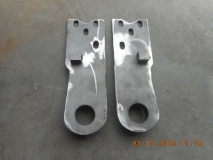
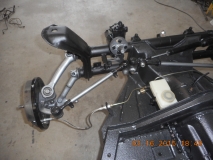
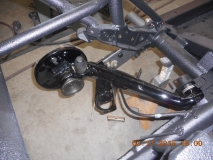
The rear gets adjustable spring plates. Since Brian has chosen to run Type II, (Bus) CV's that give extra travel, the spring plates can be notched to add travel to the rear. And, the trailing arms are of the '69 - '70 vintage that came with 4 bolts attaching them to the spring plate, I feel compelled to install the 4th bolt. The IRS rear suspension is adjustable to toe in/out and has slotted holes for the adjustment, so the spring plate needed to be slotted for the 4 bolt hole.

I like to put the brakes together on the bench and then install everything at once.
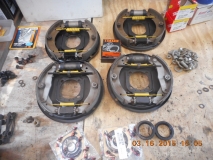
Now to put this pretty stuff together!
Brian expressed he wanted a little adjustability in the buggy's suspension. So, we added adjustments both front and rear.
For the beam, dual SAW adjusters are added. I have seen a buddy who used these exact same type of adjusters have one break. The external adjusting "box" factory welds broke and left the adjuster useless. When I add these Adjusters, I also run a small bead over to the four corners of the "box" for a better attaching weld. Does not look that pretty, but better working that pretty.
The original front bumper was attached with bolts drilled right through the beam shock towers. Not the strongest way, but got the job done. Since the new bumper I made attaches direct to the beam tube, I filed these holes. They had been overtightened and slightly crushed the sheet metal, and that was bent back out before welding.
Something else I do is to solid weld the factory pinch welded seams of the shock towers. I do this on the rear transmission fram horns too, (forgot to photo before coating). Not only does it add strength to the shock tower over the pinch spot welding, but it also seals out the moisture of this area that in the East US, tends to rot out from the inside out.
Old ball joints pressed out, new one pressed in.
I clear coat the actual ball joint once it is pressed in so it will not rust and look new for a long time to come. Another subtle item, but adds just a little more color to the overall package.
Adjusted the steering box and put it back together. Painted the tie rod ends and the tie rods.
The rear gets adjustable spring plates. Since Brian has chosen to run Type II, (Bus) CV's that give extra travel, the spring plates can be notched to add travel to the rear. And, the trailing arms are of the '69 - '70 vintage that came with 4 bolts attaching them to the spring plate, I feel compelled to install the 4th bolt. The IRS rear suspension is adjustable to toe in/out and has slotted holes for the adjustment, so the spring plate needed to be slotted for the 4 bolt hole.
I like to put the brakes together on the bench and then install everything at once.
Now to put this pretty stuff together!
-
joescoolcustoms
- Posts: 286
- Joined: Mon Jun 03, 2013 5:00 am
- Location: Saint Albans, WV
Re: First Build thread of 2015 and of the new Forum - Lorett
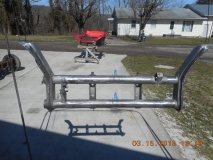
With the beam bolted on, time to put it together!
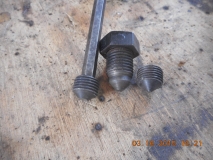
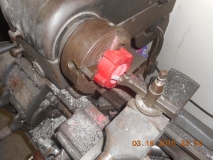
Kind of hard to see in the picture, but the new set screws for the adjusters are very pointed. The original grub screw has a rounded nose. Reason is so when these are torqued into the torsion springs, no stress is added to the dimpled area of the spring pack. If these new set screws are installed as is, it has the potential to stressing the leaf springs and causing them to crack. I slightly round the point off similar to stock.
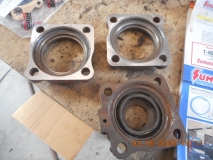
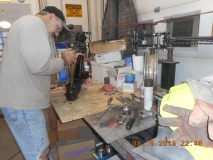
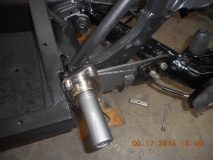
Another trick I learned. On the rear caps for the bearing housing, I lightly flat sand them. Over the years, through countless PO's over torquing them, some tend to get slightly warped. This is not a big deal for IRS due to using none flowing grease, but for a swing axle, it can be the difference between a leaking axle tube end, and a dry one.
Last year was a rough year for me with wheel bearings. At 8000 miles and again at 10,000 miles I lost inside rear wheel bearings. Of course, while on trips, and they are the single hardest bearing to replace while on the road. Cheap Chinese Crap! Come to find out, I can buy these cheap bearings for $ 1.00 each!!!! Since then, I have searched and found a bearing distributor close to me that will get me good USA made Timken bearings. Only problem is, the matching size is double sealed. No problem, just pop out the seals and go forward.
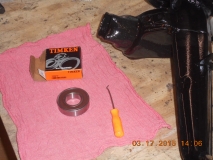
Press in the bearings.
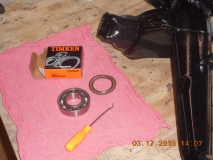
Install the snap rings.
Press in the seal and then press in the Thing, (Type 181) Axle Stub.
It is well know how badly I hate the red urethane suspension bushings. I call them "Squeakers". Even with the proper grease, they either squeak or do not. I called some experts in the business and spoke to them hunting original rubber for these, but, no one makes rubber for larger sizes that are needed for the adjustable spring plates. And to their advice, chamfering, proper retaining plate spacing and plenty of proper grease is the answer. OK, I will try all the above. Did you know that urethane can be turned on a lathe? I did not until I tried it, and if you go slow, it can be machined like metal.
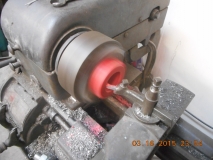
After copious amounts of "Prothane" brand urethane grease, Brian can report back how it goes over the long term.
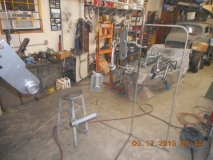
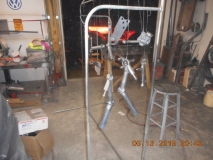
Lets put this chassis together!!!!
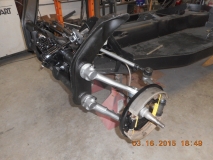

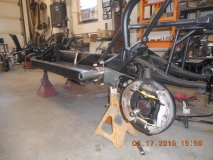
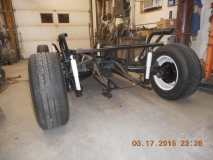
And now, Loretta gets some legs under her for the first time in several month's.

That is up to date. Closing in on the finish line!
Kind of hard to see in the picture, but the new set screws for the adjusters are very pointed. The original grub screw has a rounded nose. Reason is so when these are torqued into the torsion springs, no stress is added to the dimpled area of the spring pack. If these new set screws are installed as is, it has the potential to stressing the leaf springs and causing them to crack. I slightly round the point off similar to stock.
Another trick I learned. On the rear caps for the bearing housing, I lightly flat sand them. Over the years, through countless PO's over torquing them, some tend to get slightly warped. This is not a big deal for IRS due to using none flowing grease, but for a swing axle, it can be the difference between a leaking axle tube end, and a dry one.
Last year was a rough year for me with wheel bearings. At 8000 miles and again at 10,000 miles I lost inside rear wheel bearings. Of course, while on trips, and they are the single hardest bearing to replace while on the road. Cheap Chinese Crap! Come to find out, I can buy these cheap bearings for $ 1.00 each!!!! Since then, I have searched and found a bearing distributor close to me that will get me good USA made Timken bearings. Only problem is, the matching size is double sealed. No problem, just pop out the seals and go forward.
Press in the bearings.
Install the snap rings.
Press in the seal and then press in the Thing, (Type 181) Axle Stub.
It is well know how badly I hate the red urethane suspension bushings. I call them "Squeakers". Even with the proper grease, they either squeak or do not. I called some experts in the business and spoke to them hunting original rubber for these, but, no one makes rubber for larger sizes that are needed for the adjustable spring plates. And to their advice, chamfering, proper retaining plate spacing and plenty of proper grease is the answer. OK, I will try all the above. Did you know that urethane can be turned on a lathe? I did not until I tried it, and if you go slow, it can be machined like metal.
After copious amounts of "Prothane" brand urethane grease, Brian can report back how it goes over the long term.
Lets put this chassis together!!!!
And now, Loretta gets some legs under her for the first time in several month's.
That is up to date. Closing in on the finish line!

Re: First Build thread of 2015 and of the new Forum - Lorett
Joe, Excellent work!! 
Did you make this roller assembly? I really like this setup!
Did you make this roller assembly? I really like this setup!
-
joescoolcustoms
- Posts: 286
- Joined: Mon Jun 03, 2013 5:00 am
- Location: Saint Albans, WV
Re: First Build thread of 2015 and of the new Forum - Lorett
Thank you Vince!
No, I do not make them. It is a stocking set up made by Unique Parts. It is called a "Speed Ball Kit # 2". It is quality made and fits really nicely.
http://www.thesamba.com/vw/classifieds/ ... id=1333757
No, I do not make them. It is a stocking set up made by Unique Parts. It is called a "Speed Ball Kit # 2". It is quality made and fits really nicely.
http://www.thesamba.com/vw/classifieds/ ... id=1333757
-
marklandon
- Posts: 62
- Joined: Sat Jul 02, 2011 5:00 am
- Location: BHC
Re: First Build thread of 2015 and of the new Forum - Lorett
OK Joe what is the part number for the timken bearing???
by the way great job
by the way great job
-
joescoolcustoms
- Posts: 286
- Joined: Mon Jun 03, 2013 5:00 am
- Location: Saint Albans, WV
Re: First Build thread of 2015 and of the new Forum - Lorett
Thanks Mark!
So it will be re-searchable, the part number for the Timken bearing is "206PP". The cost for that inner was $ 20.00 each. Which is very affordable.
Timken also carries the front, BJ outer bearing set for $ 16.00 each. That part number is "LM11710 LM11749". One number is the outer race and the other number is the bearing.
I purchased them through BDI. Bearing Distributors Inc. They have several locations in the US, and will also ship to your door.
BDI could get me the rear IRS outer bearing, but at a staggering cost of $ 120.00 each. So, I am still on the hunt for a better bearing then the Chinese crap.
Re: First Build thread of 2015 and of the new Forum - Lorett
surfnc wrote:Joe, Excellent work!!
Did you make this roller assembly? I really like this setup!
I installed this setup in the Tow'd along with their clutch arm replacement. Lori Ann prefers a pedal over a roller and this setup takes a lot of slop out of the operation. It works great!
Mike Dario
Mohave Valley, AZ
Manx Club #957
Manx Club President
Tow'd (Hers)
Manxvair (His)
Manxter Dual Sport #30 Baja Edition #2 (Ours)
Resorter #19-Fuscia(under construction)
Mohave Valley, AZ
Manx Club #957
Manx Club President
Tow'd (Hers)
Manxvair (His)
Manxter Dual Sport #30 Baja Edition #2 (Ours)
Resorter #19-Fuscia(under construction)
-
joescoolcustoms
- Posts: 286
- Joined: Mon Jun 03, 2013 5:00 am
- Location: Saint Albans, WV
Re: First Build thread of 2015 and of the new Forum - Lorett
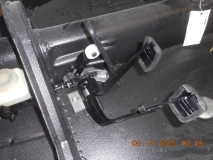
manxvair wrote:Also, if you note in the picture, there is a 1 inch spacer between the clutch and brake peddle on the shaft. This is the Big Foot kit. It has the cable roller that Mike speaks of for the cable end for smooth operation and long lasting service and it spaces the clutch peddle 1 inch further away from the brake peddle for us "big feet" people.surfnc wrote:Joe, Excellent work!!
Did you make this roller assembly? I really like this setup!
I installed this setup in the Tow'd along with their clutch arm replacement. Lori Ann prefers a pedal over a roller and this setup takes a lot of slop out of the operation. It works great!
Re: First Build thread of 2015 and of the new Forum - Lorett
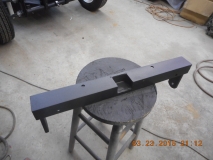
I notice that the brake/clutch petal adjustment stop bar behind the petals is not the std VW metal stamping. Do you find this custom piece works better. It looks very stout.
-
joescoolcustoms
- Posts: 286
- Joined: Mon Jun 03, 2013 5:00 am
- Location: Saint Albans, WV
Re: First Build thread of 2015 and of the new Forum - Lorett
Mike, it is stout, and it comes with the peddle kit from Unique Parts. Because the clutch peddle is further away from the brake peddle, the stock stop is too narrow, so they include one with the kit.Mike1991 wrote:I notice that the brake/clutch petal adjustment stop bar behind the petals is not the std VW metal stamping. Do you find this custom piece works better. It looks very stout.
I have used several kits from Unique Parts, and have not needed to alter/modify anything to make them work. They bolt right in and work from the start. Unlike a lot of other aftermarket parts out there.
Re: First Build thread of 2015 and of the new Forum - Lorett
What a fantastic build thread, thanks so much!
-
joescoolcustoms
- Posts: 286
- Joined: Mon Jun 03, 2013 5:00 am
- Location: Saint Albans, WV
Re: First Build thread of 2015 and of the new Forum - Lorett
Thank you!enesset wrote:What a fantastic build thread, thanks so much!
Glad you like it.
-
joescoolcustoms
- Posts: 286
- Joined: Mon Jun 03, 2013 5:00 am
- Location: Saint Albans, WV
Re: First Build thread of 2015 and of the new Forum - Lorett
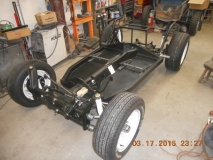
Finished off the small items on the chassis and it is now complete. Ready for a engine and transmission. Have I said how much I would like to keep this one for myself?
Since all the front suspension is new, it will need to be aligned before Brian makes it home, or it will chew the tires off of it. The Ball Joint front suspension is much easier to align than the Link Pin and King Pin front suspension. It does take just one special tool that can be substituted by some creative juggling around. (channel locks)
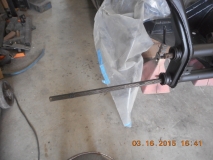
A Eccentric bushing wrench.. It is thin to slide in the tight space and is used to move the eccentric bushing to set caster and camber.
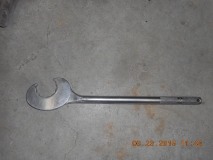
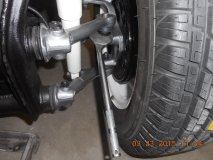
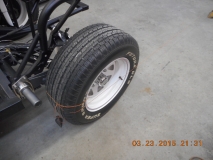
Aligning a suspension on a VW/Buggy is actually easy if you have some very common tools and take your time. I have been aligning my VW's since 1981 like this and it works very well. I get good tire wear and they handle to 100 + MPH.
I use a common carpenters level to set the camber. I made a piece of steel flat stock that sits on the rim bead and comes out far enough to put a level on and set them to 0.5* positive camber, (top of tire further out than bottom), which is close to 1/16 inch in 24 inches, or the top out 1/16 inch further than the bottom. (you have to check and ensure the rim is straight, or go by the side wall of the tire, but a little forward of the bottom bulge where it touches the ground.
I also use about a 100 pound slug of steel to help set ride height when doing this.
To set toe in, I use another simple method. I put masking tape on the tread of the tire so I can see where I hook my tape measure, record the measurement.
Roll the car forward/rearward until the tape is now on the backside of the tire, measure and compare, adjust until I get between 1/16 and 1/8 inch toe in. What the tape does, is mark a spot on the tread, so if the tread wobbles, it does not matter because I am measuring the same spot over and over again and that takes the variable out of the tread pattern.
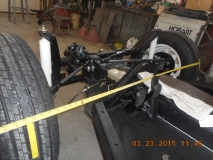
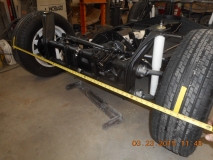
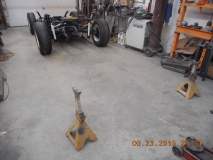
I also use a very basic approach to align the rear wheels, for both IRS and Swing Axle. Tie a string to the tire at the front, run it toward the rear to a jack stand at 10 foot behind the tire. Do it for both sides. Once your string is in place, move the jack stand in/out until the string just touches the tire side wall. This is the plane the tire is pointing in.
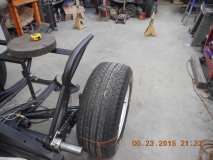
Then measure the distance between the strings right behind the tire and back at 10 foot. The rear should be between 1/4 and 1/2 inch wider to hit the VW spec's on rear toe in. Loosen the spring plate bolts to move the wheel forward/rearward to make the changes.
I was able to get Loretta's set at 0.119* of toe in, which is spot on to the VW Spec.
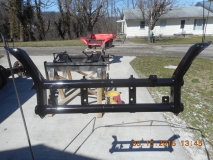
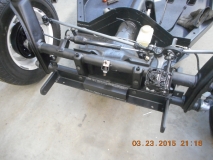
Altered the tow bar mount to clear the lower adjuster and still use the cool custom tow set up Brian got with Loretta when he bought her.
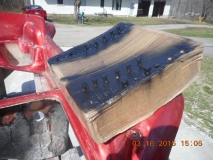
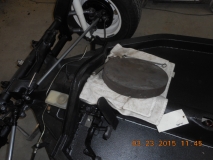
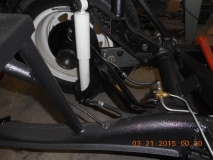
Vincent P had asked if I put any baffles in the fuel tank when I modified it. For those who do not know, Vincent enjoys High end racing like F1 and knows some cool things about cars. So, it got me thinking, then I went and studied up on fuel tank design. With how the tank has a flat floor, it is possible when the fuel gets low, it can move away from the pickup easily and starve the engine. A pickup needs a baffle/blockage or sump that helps keep fuel at the pick up even during low fuel times. So, I cut the tank open and built in a little sump.
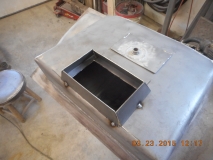
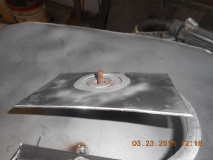
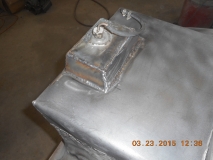
When I had the tank in the body and on the chassis, I measured to ensure I had room for this additional sump. So, now to seal the inside and coat the outside of the tank and it is finished.
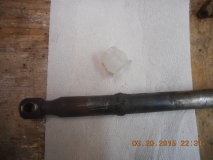
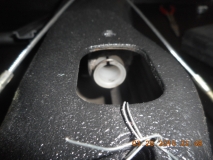
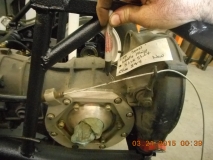
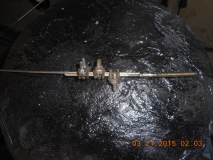
When I removed the shift rod at tear down time, it did not have a shift rod bushing. No wonder, the weld prevented it for being about to slide through the bushing.
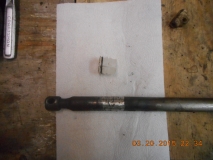
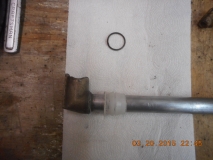
New bushing installed and it should shift like a dream now.
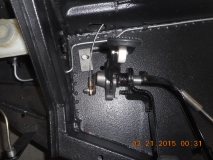
All brake lines finished and brakes bled and adjusted. A trick that David C taught me is to clean up the small parts, leave natural and clear coat with a satin clear. It gives color to the chassis, and protects the parts.
Another shot of the Unique Parts Clutch setup. It provides a new pivot shaft that has a threaded stud with a brass bushing to reduce friction. Then captured with a nyloc nut and washer. Smooth operation. Maintains original geometry to keep from undo wear and utilized the stock clutch cable.
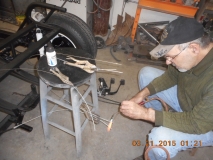
On to cable shortening. There are several ways to shorten cables for buggy's, and most work really well. This is how I have been doing it for a lot of years and it works for a long service life.
Mark where the cable needs cut. Sometimes I use masking tape or a sharpie pen.
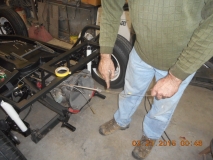
I cut them with a cut off wheel so it makes a clean cut. Then use Solder to wick into the cable strands and bind them, which keeps them from unraveling. The solder is Silver Brazing solder, not the solder used on copper pipes or your wiring.
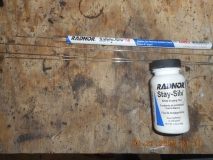
The acid flux helps the silver wick into the strands and flow better. But, being Acid Flux, it has to be cleaned off so it does not cause early corrosion of the cables.
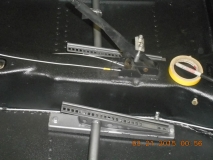
I use several clamps to hold the cables, but not so tight to distort the cables and ruin them. And solder the ends.
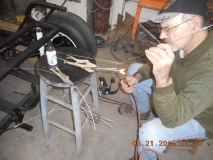
My old "Pres-to-lite" acetylene torch set up I use for plumbing work come in handy.

It makes for a very nice and clean cable end. And since it will not crush and unravel, the cable can be taken out and back in with ease.
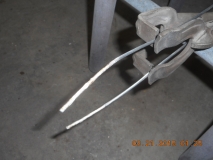
For the clutch, I use three cable clamps. They now can dig into the silver solder and get good grip without ruining the cables. Also note in the picture, the solder does not go all the way up to the threaded portion of the clutch cable. This will allow the cable to flex and move as needed without being stiff and breaking.
And that is the end of the chassis part of Brian's rebuild of Loretta. I have some cosmetic work to do on the body, and then Brian will pick up the complete package and on to the next chapter of the build. As I get the bumpers from the chrome shop and the roll cage from the powder coater, I will post up those pictures.
Since all the front suspension is new, it will need to be aligned before Brian makes it home, or it will chew the tires off of it. The Ball Joint front suspension is much easier to align than the Link Pin and King Pin front suspension. It does take just one special tool that can be substituted by some creative juggling around. (channel locks)
A Eccentric bushing wrench.. It is thin to slide in the tight space and is used to move the eccentric bushing to set caster and camber.
Aligning a suspension on a VW/Buggy is actually easy if you have some very common tools and take your time. I have been aligning my VW's since 1981 like this and it works very well. I get good tire wear and they handle to 100 + MPH.
I use a common carpenters level to set the camber. I made a piece of steel flat stock that sits on the rim bead and comes out far enough to put a level on and set them to 0.5* positive camber, (top of tire further out than bottom), which is close to 1/16 inch in 24 inches, or the top out 1/16 inch further than the bottom. (you have to check and ensure the rim is straight, or go by the side wall of the tire, but a little forward of the bottom bulge where it touches the ground.
I also use about a 100 pound slug of steel to help set ride height when doing this.
To set toe in, I use another simple method. I put masking tape on the tread of the tire so I can see where I hook my tape measure, record the measurement.
Roll the car forward/rearward until the tape is now on the backside of the tire, measure and compare, adjust until I get between 1/16 and 1/8 inch toe in. What the tape does, is mark a spot on the tread, so if the tread wobbles, it does not matter because I am measuring the same spot over and over again and that takes the variable out of the tread pattern.
I also use a very basic approach to align the rear wheels, for both IRS and Swing Axle. Tie a string to the tire at the front, run it toward the rear to a jack stand at 10 foot behind the tire. Do it for both sides. Once your string is in place, move the jack stand in/out until the string just touches the tire side wall. This is the plane the tire is pointing in.
Then measure the distance between the strings right behind the tire and back at 10 foot. The rear should be between 1/4 and 1/2 inch wider to hit the VW spec's on rear toe in. Loosen the spring plate bolts to move the wheel forward/rearward to make the changes.
I was able to get Loretta's set at 0.119* of toe in, which is spot on to the VW Spec.
Altered the tow bar mount to clear the lower adjuster and still use the cool custom tow set up Brian got with Loretta when he bought her.
Vincent P had asked if I put any baffles in the fuel tank when I modified it. For those who do not know, Vincent enjoys High end racing like F1 and knows some cool things about cars. So, it got me thinking, then I went and studied up on fuel tank design. With how the tank has a flat floor, it is possible when the fuel gets low, it can move away from the pickup easily and starve the engine. A pickup needs a baffle/blockage or sump that helps keep fuel at the pick up even during low fuel times. So, I cut the tank open and built in a little sump.
When I had the tank in the body and on the chassis, I measured to ensure I had room for this additional sump. So, now to seal the inside and coat the outside of the tank and it is finished.
When I removed the shift rod at tear down time, it did not have a shift rod bushing. No wonder, the weld prevented it for being about to slide through the bushing.
New bushing installed and it should shift like a dream now.
All brake lines finished and brakes bled and adjusted. A trick that David C taught me is to clean up the small parts, leave natural and clear coat with a satin clear. It gives color to the chassis, and protects the parts.
Another shot of the Unique Parts Clutch setup. It provides a new pivot shaft that has a threaded stud with a brass bushing to reduce friction. Then captured with a nyloc nut and washer. Smooth operation. Maintains original geometry to keep from undo wear and utilized the stock clutch cable.
On to cable shortening. There are several ways to shorten cables for buggy's, and most work really well. This is how I have been doing it for a lot of years and it works for a long service life.
Mark where the cable needs cut. Sometimes I use masking tape or a sharpie pen.
I cut them with a cut off wheel so it makes a clean cut. Then use Solder to wick into the cable strands and bind them, which keeps them from unraveling. The solder is Silver Brazing solder, not the solder used on copper pipes or your wiring.
The acid flux helps the silver wick into the strands and flow better. But, being Acid Flux, it has to be cleaned off so it does not cause early corrosion of the cables.
I use several clamps to hold the cables, but not so tight to distort the cables and ruin them. And solder the ends.
My old "Pres-to-lite" acetylene torch set up I use for plumbing work come in handy.
It makes for a very nice and clean cable end. And since it will not crush and unravel, the cable can be taken out and back in with ease.
For the clutch, I use three cable clamps. They now can dig into the silver solder and get good grip without ruining the cables. Also note in the picture, the solder does not go all the way up to the threaded portion of the clutch cable. This will allow the cable to flex and move as needed without being stiff and breaking.
And that is the end of the chassis part of Brian's rebuild of Loretta. I have some cosmetic work to do on the body, and then Brian will pick up the complete package and on to the next chapter of the build. As I get the bumpers from the chrome shop and the roll cage from the powder coater, I will post up those pictures.