First Build thread of 2015 and of the new Forum - Loretta

How-to building, restoration, repairs, and fun with your authentic Manx!
User avatar
joescoolcustoms
Posts: 286
Joined: Mon Jun 03, 2013 5:00 am
Location: Saint Albans, WV

Re: First Build thread of 2015 and of the new Forum - Lorett

Post by joescoolcustoms »

I feel like I am moving like a snail, but am trying to be very thorough so as to not miss a small detail item that cannot be added later due to coatings.

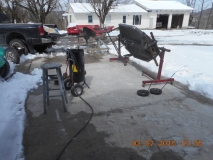
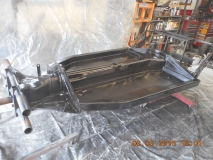
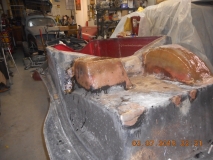
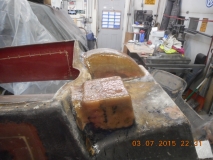
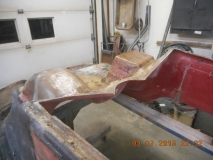
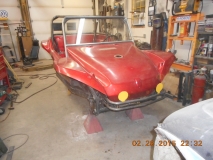
Since the cage is complete, it is tear down time.
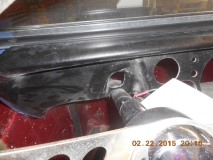
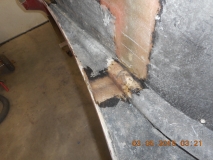
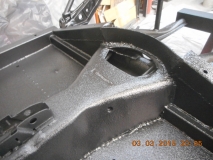
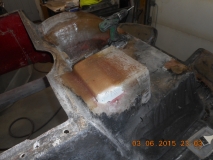
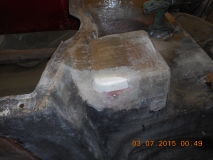
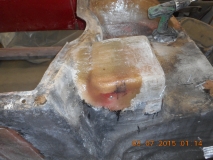
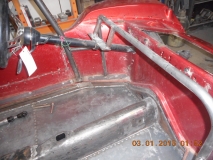
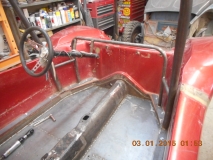
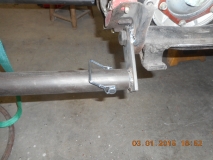
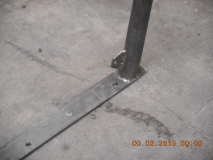
I had forgotten to photo the steering column support before installing the hood, so here it is. The actual support is so strong, I can stand all my 220 ponds on it without flexing. Should make for a solid steering feel, and is set up so that a steering column upgrade can be made in the future without needing to alter this mount.

1180

1181

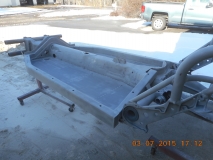
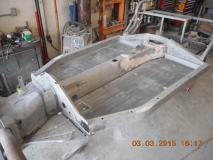
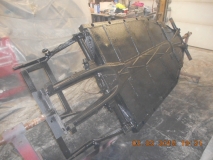
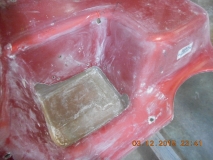
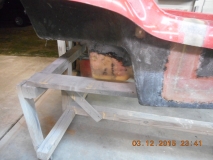
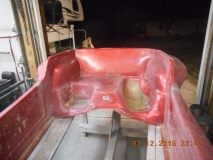
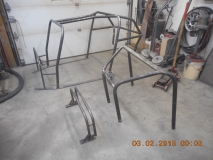
Next is to totally pull it apart.

1182

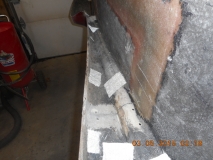
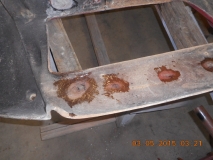
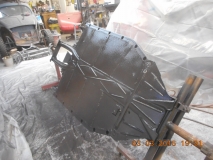
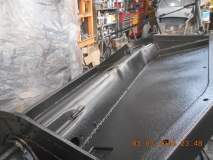
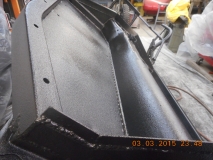
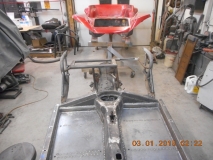
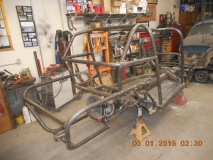
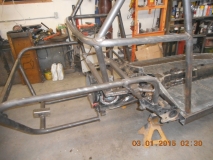
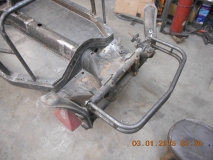
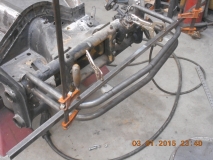
A few shots of the rear support that configures it's way around the battery and spare tire well to pick up the transaxle frame horns, ties into the roll cage and rear bumper. This is before final welding.

1183

1184

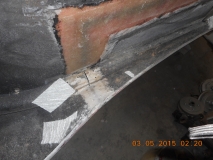
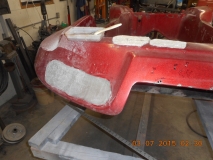
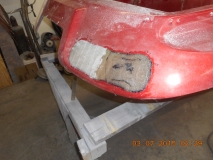
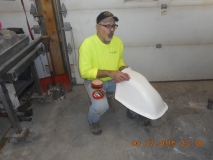
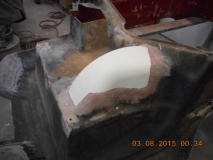
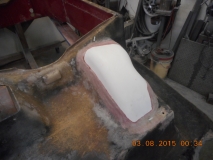
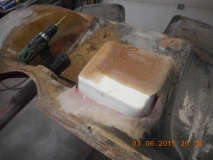
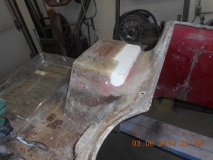
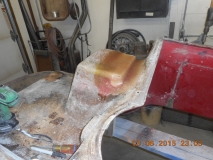
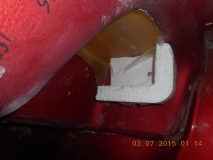
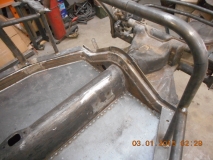
After building several buggy's and not liking the body fitment around the front Napoleons Hat area, I make a "rain lip" to help seal up the front. The original German design in this area used a lip that hung down on the body and shielded the seal here. So, once Brian installs the body for the last time, he can use some sealant here and have a really good air and water tight seal for those times he gets caught out in the weather.

1185

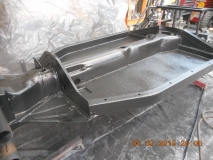
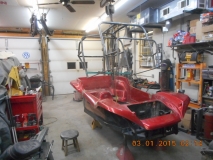
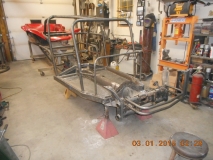
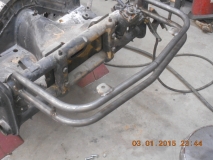
The cage sitting on the bare chassis to show how it all ties together.

1186

1187

1188

1189

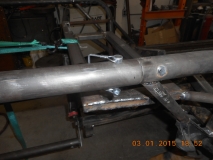
I use quick release pins for the rear bumper to make it easy to remove. Pop a 2-pin weather tight connector for the license plate light, pull 4 pins and the rear bumper slides off. Makes it quick and easy. 30 seconds off and 30 seconds back on. Drill through the bumper tubeing and the inner welded sleeve for a smooth looking fitment.

1190

1191

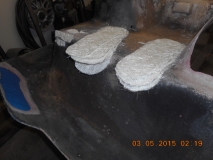
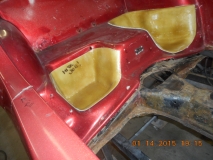
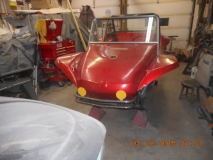
Right before I pulled the buggy apart, I asked Brian if he had thought about amber fog lights. So I mocked up a set of yellow painted cardboard to get an idea of where to weld on light tabs.

1178

1179

Used some square tubing to hold in place to tack, and then weld the light tabs.

1194

1195

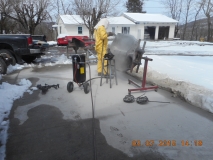
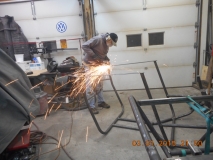
Finished welding on the bumpers and cage, dress up work. (notice the personal protection of the lungs and ears. you only get one life, protect it)

1192

Seat Belt tabs welded on the cage.

1197

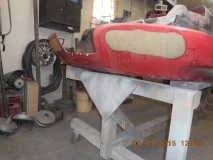
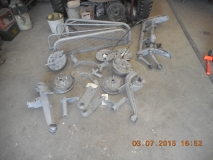
Cage and bumpers completed and ready for coatings.

1196

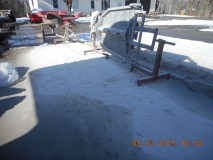
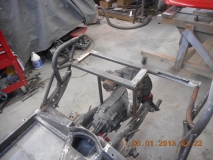
Chassis on hillbilly rotisserie ready for final welding.

1198

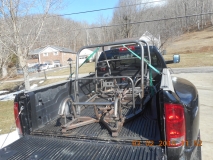
Cage and another chassis loaded up and going to the powder coater.

1199

Then the bumpers, and another original Manx bumper loaded up and going to the Chrome Shop. Blingity Bling!

1200
User avatar
surfnc
Posts: 89
Joined: Mon Oct 11, 2010 5:00 am
Location: Outer Banks NC 27954

Re: First Build thread of 2015 and of the new Forum - Lorett

Post by surfnc »

Joe, as always very nice work!! I am in awe of your skill and especially your attention to detail.

Vince
bossbug
Posts: 2
Joined: Thu Jan 29, 2015 4:40 am

Re: First Build thread of 2015 and of the new Forum - Lorett

Post by bossbug »

Joe awesome work! People who know what they are doing make it look easy. I do have a question, if you don't mind? Do you need to relocate where the steering column passes through the body (fire wall) and the dash With the body lift. Thanks, Mark.
User avatar
joescoolcustoms
Posts: 286
Joined: Mon Jun 03, 2013 5:00 am
Location: Saint Albans, WV

Re: First Build thread of 2015 and of the new Forum - Lorett

Post by joescoolcustoms »

Thank you Vince! I appreciate your compliment! As you know with the fine quality buggy's you build, those small details make the final product really nice to drive and fun to look at.

Mark, the steering column has to stay in the same position when the body is lifted to maintain the alignment of the steering shaft out of the steering box. Or other means like a double jointed shaft used. If the column is just tilted upward, it will tilt the steering wheel into the windscreen glass, or make it super close to it and at an angle uncomfortable to drive with.

In this picture you can see where I filled the original hole where the column tube passes through the forward firewall, and the new hole is lower.

1181

In this photo you can see the new position of the column with respect to the dash. I will fill the original hole in the dash.

1201
bossbug
Posts: 2
Joined: Thu Jan 29, 2015 4:40 am

Re: First Build thread of 2015 and of the new Forum - Lorett

Post by bossbug »

Thanks Joe. Good pics I see what you did. Brian is going to have a pretty sweet ride.
User avatar
abgiles
Posts: 226
Joined: Thu Jan 01, 1970 1:00 am
Location: Yulee, FL

Re: First Build thread of 2015 and of the new Forum - Lorett

Post by abgiles »

bossbug wrote:Thanks Joe. Good pics I see what you did. Brian is going to have a pretty sweet ride.

As long as I can do justice to the rest of the build. He's set the bar pretty high, and I'm sure I'll be consulting him frequently.
(Loretta) Manx # M2940D910E on customized 1970 chassis that has been "Wheelerized" by Joescoolcustoms
(Scarlett) Manx Resorter #12 (R0012B931S) on 1969 chassis.
(Gunther) Manx 2 # A0202A035E
Tow'dster # TF530G913S
Original Home built buggy that I learned to drive in back in 1995 (the one that started my passion).
Club Member # 4436

Loretta: http://www.manxclub.com/forum/viewtopic ... t=3365Manx" onclick="window.open(this.href);return false;
User avatar
joescoolcustoms
Posts: 286
Joined: Mon Jun 03, 2013 5:00 am
Location: Saint Albans, WV

Re: First Build thread of 2015 and of the new Forum - Lorett

Post by joescoolcustoms »

Been a little while since I have last posted, but the weather has changed and I have been busy trying to make progress.

While the rain and the snow came through dropping 10 inches on us, again, I set myself up some work I could get done quietly. The rear of the body had three large holes on each side for Impala Tail Lights. Brian is going with something different, so they needed filled. In a circumstance like this, it is a lot more work to fill 6 holes and all the associated mounting stud holes, than it is to fill 2 holes. So, I cut the little centers out and made two big holes.

I tapered the inside of the glass down to a knife edge like the other repairs, used masking tape to form a mold backing. There are several ways to do this, and you can get real technical with it, but I go quick and dirty. The tape is not the best solution because it follows a straight line top to bottom or side to side, however the tape is laid on the open hole. Tape will not provide a curved surface matching the body contour, but is very quick to make. Down and dirty mold making skill level that I like. I will address the "flatness" later.

Tapered and taped.

1238

Cutting out the pieces of layers. I use a sharpy marker to label/orient and trace a pattern for cutting.

1248

Got everything ready to start. Smallest patch on top, larger to the bottom to fill the taper. Already cut, laid out close to the work makes it a lot easier once the resin is mixed and tends to keep the mess to a minimum.

1239

And again, I prep forward in work to have areas to "spend" any left over mixed resin. Waste not, want not. The tubes needed to be patched as well as the side doors were.

(I got a little greedy with the grinder and went through the tube. Here you can see it and see the fiberglass crescent Bruce made to lay in and shoot the chopper gun over top of the make the strengthening tubes after he stopped using the pool hose.)

1240

1241

4 layers of 2 ounce mat later. (A day or two later, I sanded the inner repair and laid 3 more layers on it to get a total of 7 layers of the mat. This built up the repair to the same thickness as the rest of the body in that area.)

1242

1245

1243

Even laid in some repairs on the very front up underneath the hood in front of the fuel tank.

1244

It is hard to see, but, this is where the tape lays flat and does not follow the contour of the body.

1246

1247

The way the body is made, the center of the hole was very close to flat across the hole, but it develops a slight compound contour towards the outside of the hole, and the tape was off towards the outside of each repaired hole. Now, I view fiberglass and resin the same way as I view normal Bondo style body fillers. Both take up space, both have a hardner to mix into the "paste", so, for me, if it is sunken or shallow, just lay some glass on it, then shape it just like you would Bondo fillers. I needed two layers on the outside to fill in the shallow area.

Lightly sanded and prepped. Fill pieces ready, time to get busy.

1230

1229

Work it down to the desired shape and ready for finish body work. Easy peasy.
User avatar
joescoolcustoms
Posts: 286
Joined: Mon Jun 03, 2013 5:00 am
Location: Saint Albans, WV

Re: First Build thread of 2015 and of the new Forum - Lorett

Post by joescoolcustoms »

Whoops!

Here it is finished on the inside. I like to knock down the freshly laid glass so it does not have little stickers and jagged edges to tear the flesh from your hands when working up underneath the body. A lot of you know exactly what I am talking about. Those tiny shards of glass hurt!!

1250

The next time I have resin mixed up, I will use a brush and paint some resin on this repair to seal up the porous areas that were ground exposing some glass. This keeps water/moisture out of the finished glass helping preserve it longer into the future.
Laxkraap
Posts: 22
Joined: Fri Jan 23, 2015 8:42 am

Re: First Build thread of 2015 and of the new Forum - Lorett

Post by Laxkraap »

Joe,what are the white verticle lines on the repair of the tail light area?orientation of repair patch?
Tony
"So i got that goin' for me,which is nice"
User avatar
joescoolcustoms
Posts: 286
Joined: Mon Jun 03, 2013 5:00 am
Location: Saint Albans, WV

Re: First Build thread of 2015 and of the new Forum - Lorett

Post by joescoolcustoms »

Laxkraap wrote:Joe,what are the white verticle lines on the repair of the tail light area?orientation of repair patch?
Tony
Those white vertical lines are where the tape overlaps revealing a small ledge the resin formed to it. The thickness of the tape itself. Hardly noticeable until a flash of light hits them.

That is part of the draw back to my quick molding method. But, since there is going to be a lot of work done on this area to cherry it out, they present about a 30 second problem with a sanding block. IMO, a small price to pay for the quickness of set up time by using just the tape as a mold.

Thanks for asking!
User avatar
joescoolcustoms
Posts: 286
Joined: Mon Jun 03, 2013 5:00 am
Location: Saint Albans, WV

Re: First Build thread of 2015 and of the new Forum - Lorett

Post by joescoolcustoms »

Since it is raining like crazy, and waiting on the garage to heat up, another update on Loretta.

Since I was in the fiberglass mood, I also prepped the spare tire well for it's repair. Both the spare tire well and the battery well were badly hacked by PO's in order to clear the rear IRS suspension. One of the purposes to building the chassis with a 2 inch body lift was to clear the wells properly, then restore the wells back to original. Since the doors were restored back to original, why not the rest of the body, right?

I know this follically challenged dude down South that has a buggy or two, likes to huff resin fumes when he can, and knows a little about fiberglass. We struck a deal and he made a couple of "plugs" for me. One of the spare tire well and one of the battery well. These are not only for Loretta, but for the Franken Manx I have, so they will get used more than once.

1272

A tight fit of the plug to the body is essential, and since each body varies do to the environment is has been exposed to in the past 40 years, warppage and shrinkage change their shape. I fit it as close to the body as possible, but in case it had gaps, I waxed the original gel coat of the body several times so any resin leakage past the plug would not stick to the body. Then also waxed the plug mold several times.

1251

Bolted the plug mold into the body and started cutting fiberglass mat in prep of the lay up.

1252

1253

Notice how the tapering of the old glass come down to a knife edge and smoothly transitions into the plug mold. This helps make the repair very smooth surface-to-surface once set up. Ready to start laying the glass on.

1254

And glassed in. First layer against the plug mold was 2 ounce mat. Next two layers was 6 ounce woven cloth. Next three layers was 2 ounce mat for a finished thickness of about 5/16 inch. The cloth is a lot stronger than the mat due to the lattice like matrix it has. But, if used by itself, it can give a texture look to the repair and show up later in the correct light. Since the mat does not have any pattern, when it shows up, it looks so scattered that it does not pull your eye to it. Mixing the two causes no problems because both are glass, but it builds strength into the repair. And the final exposed surface tends to match the original chopper gun texture the best and not pop out as a repair when being looked at.

1255

Once the layup started building heat and was solid to touch, I pulled the bolts out and shortly the plug mold popped off the body.

1256

It is kind of hard to see and tell from the pictures, but incredibly smooth and the transition is almost dead on from the repair to the body. Very little interior work to be done. As with the tail light section described above, I over cut out the body eliminating about 30 small holes that also needed to be repaired. Why fix two small areas and 30 holes when I can just make one repair and get it all. A lot less finish body work to do. The dark areas are the sharpie pen marks I made to orient me during lay up prep and show through the translucent resin.

1269

1270

1271

I am pleased with how it turned out. Thanks to Chris, Vince and Tom for the help and guidance on doing this style of repair. I know I have asked Vince a thousand questions at his fiberglass courses he teaches during MOTB. And Chris with the late night calls to ask one more question. But that is what makes life fun, right?
User avatar
joescoolcustoms
Posts: 286
Joined: Mon Jun 03, 2013 5:00 am
Location: Saint Albans, WV

Re: First Build thread of 2015 and of the new Forum - Lorett

Post by joescoolcustoms »

I think I may have ADHD, because I like to jump around on my projects. I get bored with one thing and move to another. I think it is OK as long as progress is being made towards a end goal.

I like to buy shiny stuff!

Since the chassis is basically done, it needs prettied up. Several ways to clean things, and no one way is best for everything. I use several techniques to clean things. Putty knife to get ride of large build up, Grease solvents at a car wash, parts washer, 2 inch scotch pads on a grinder to buff off the finish and sand blasting. Sand blasting makes more of a mess than fiberglass repair, in my opinion. But it does such a great job.

Caught a afternoon before the rains hit, that turned to snow, and emptied out the sand I had in a borrowed blast pot from when I did my Puzzle Manx chassis.

1205

I decided, out of respect to my buddy who loaned me his blast pot, I needed to buy my own blasting pot. He loaned me his to use on my buggy, which is a cool thing to do. But, when I start using borrowed tools to make money with, that crosses a line of respect for a friend. Plus, who does not like buying tools?

Several days later, shoveled off driveway and new blasting pot, time to get busy.

1231

After trying everything except acid dipping, media blasting is the best way I have found to remove the pickling compound on new steel. The pickling compound is on steel as a protection factor, but needs removed for coating to have proper adhesion to the surface. Plus, the blasted surface is slightly roughed up giving a physical treatment for the coating to hang on to. And it removes the original finish very nicely.

1232

Took advantage of the blaster and prepped several other parts including rear arms, spring plates, brake drums and backing plates, nerf bars, peddle parts and other tid bits.

1233

1234

1236

1237

My blast media of preference is quartz silica, (sand) in a fine grade. The fine grade allows me to use a smaller nozzle on the blaster, passing less air through it helping keep my air compressor alive. And it does a nice job. I buy it local to me, about 1 mile away at a Cinder Block plant. Comes in 100 pound bags and cost $ 9.50 per bag. I used a total of 4 1/4 bags to blast the chassis and all the parts shown.

As I have expressed before, personal protection is a must. I wear a half face respirator, not just a dust mask, even when filling the blast pot. This stuff will cause serious health effects including Silicosis. With proper protection, there is no risk and the final results speak for themselves. You can pay to have this done by others.

1235

Once it is cleaned, time to prep it for the coatings to follow. I finished up some nit-picky welding and grinding to smooth the chassis. Applied a little body filler to the welded areas of the tunnel to make them look nicer. Then, the help thwart the rust that plagues Eastern US vehicles, every seam or overlapping area is sealed with a high quality automotive sealer. Just like the automotive manufactures use on new cars.

1258

1259

Thoroughly cleaned the surface with a vacuum and dust cloths to remove any minuscule debris on the surface. Applied 1/2 gallon of catalyzed Epoxy Primer.

1260

1261

After a tack time of 60 minutes, applied black bed liner for a good protection covering. I like to apply the bed liner when the primer has not all the way set up, just when you can still leave your finger prints in the paint. This helps the bed liner chemically melt and adhere onto the primer.

1262

1263

1265

I cover the VIN so it will show up no problem. I use a magnet, spary, and as it tacks up, pull the magnet revealing the VIN.

1266

After all the cutting, welding repairs on the tunnel, it turned out rather nice looking. This will be a very strong functional chassis for Brian and Tanya to use for many years of enjoyment.

1267

1268

And that brings us up to date. I had better get busy, spring is coming and buggy riding will be upon us shortly!
FarmerJohnLI
Posts: 14
Joined: Wed May 23, 2012 5:00 am

Re: First Build thread of 2015 and of the new Forum - Lorett

Post by FarmerJohnLI »

Joe , you look like you enjoy "waxing the mold" way too much :lol:

1251
User avatar
joescoolcustoms
Posts: 286
Joined: Mon Jun 03, 2013 5:00 am
Location: Saint Albans, WV

Re: First Build thread of 2015 and of the new Forum - Lorett

Post by joescoolcustoms »

John, once you have "waxed your mold" you are addicted and will wax your mold often.

1273

And then the addiction needs a new high. You start "Waxing your Body".

1274
User avatar
joescoolcustoms
Posts: 286
Joined: Mon Jun 03, 2013 5:00 am
Location: Saint Albans, WV

Re: First Build thread of 2015 and of the new Forum - Lorett

Post by joescoolcustoms »

After waxing the mold, a lot, the battery well is repaired.

The IRS suspension hits both the Spare Tire Well and the Battery well, as shown from the hacks done to them for clearance in the beginning of this thread. To get complete clearance, the body has to come up 3 inches. A 3 inch body lift is a lot, and with a 2 X 4 side rail, looks a little funny unless the suspension has been dramatically modified and lifted really up in the air. This buggy will get a slightly modified suspension and larger tires, so to keep it looking decent, a 2 inch lift was built into the chassis. This leaves 1 inch of the battery well to take a hit. Since this body has been hacked a lot by former PO's, the choice was to raise the battery well 1 inch and allow full suspension travel.

Because the battery well is tapered as you come up, the plug mold Chris made for me is not a direct drop in and work like the spare tire well did. I used the plug mold, but shifted it around 4 times to make the battery well.

After proper tapering of the fiberglass to expose new glass and tapered to a knife edge, first lay up, pulled back into a corner. You can clearly see the gap that will get filled.

1287

1288

Here you can see the 1 inch raise, (even though it is upside-down).

1289

Mold popped out, and prepped for another waxing, shifting, then lay up. Notice the ground down edge to a knife edge again.

1292

Second lay up. Still a gap in the front to fill.

1293

Mold popped out yet again, ground to a knife edge again and ready to wax the mold, shift it forward, bolt it in and lay up a third time.

1294

1295

Each of these lay ups received 4 layers of 2 ounce glass mat.

1296

Just a small section for the 4th lay up. Small gap now.

1297

Since this last hole had compound curves, in 3 dimensions, the plug mold would not work in that final corner. I made a small plug out of Styrofoam to fit the contour properly. Styrofoam and Polystyrene are not compatible and the Styrofoam will melt. I used some cling wrap over the foam to shield it and help it maintain the shape. Dirty and quick mold making.

1300

1298

But worked just fine.

1299

Since the inside shape was done, I went to work on the outside of the newly molded area. Smoothed all the surface even and opened up a little more fresh glass. Then laid down 2 more layers of mat to give it a smooth outward appearance resembling a stock battery well. (the black marks are from a sharpie pen I used to help me orient the large pieces of mat during lay up. it shows through due to the resin being semi translucent)

1304

1305

1307

The body was flipped over for the last time, and the new well looks nice! It will need a little shaping on the lead in curve, but came out super flat and smooth on the bottom. I am very, very pleased. Once the final finish is on, it will be hard to tell it is not Bruce's design.

1308

1309

1310

1311

All that Mother's Wax did make my hands and garage smell pretty good!
Post Reply